-
Three.js, WebXR - 1일차개발 블로그의 흔적/threeJS 2023. 1. 16. 01:23
취미로 공부하는 three.js 입니다.
예제 위주로 정리하고 있습니다.
https://github.com/dusunax/threeJS/wiki101 - y축(up)으로 회전하는 빨간 육면체 - 220101
camera.position.set(x,y,z)
scene
renderer
geometry + material = mesh
ambient & light
Control
Resize
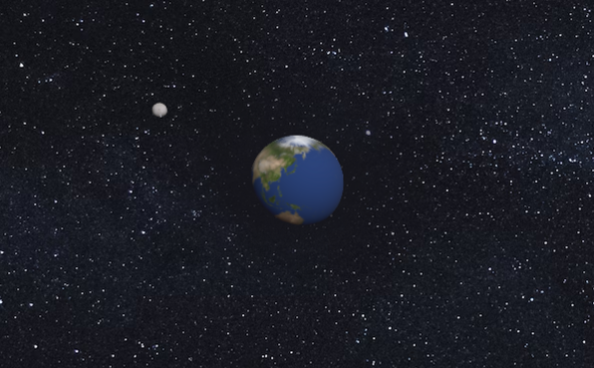
102 - 회전하는 지구와 달 - 220101
Three.js Editor
project | scene
add
map
script
child
배경 설정
Publish
101 - y축(up)으로 회전하는 빨간 육면체
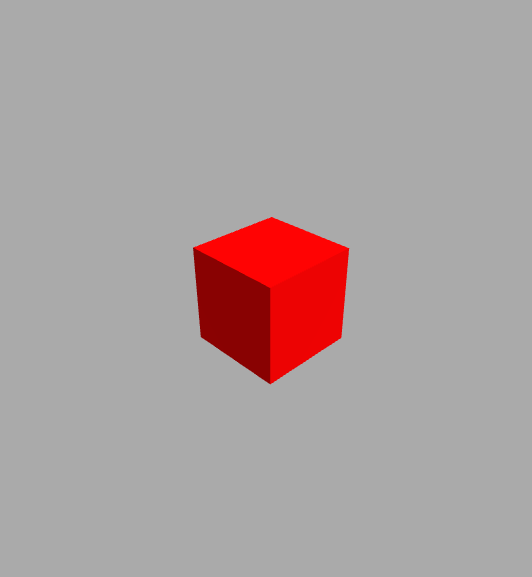
내용:
y축으로 회전하는 빨간 육면체입니다. 브라우저 화면을 드래그하여 화면의 orbit을 변경할 수 있습니다.
일자: 2023년 1월 1일(일)
강의: 유데미 강의 링크
링크: [github wiki], [github page]학습내용
- 각 scene, camera, renderer는 필수 요소입니다.
- light는 HemisphereLight, DirectionalLight를 사용했습니다.
- OrbitControls로 화면 orbit을 컨트롤합니다.
import { OrbitControls } from "../../libs/three/jsm/OrbitControls.js";
...
const controls = new OrbitControls(this.camera, this.renderer.domElement);
특이사항
- WGL의 XYZ 방향은 east, up, south와 같습니다.
- z축은 브라우저의 z-index 방향입니다.
axis WGL 방향 X east 브라우저의 X축 방향 Y up 브라우저의 Y축 방향 Z south 브라우저의 Z축 방향
기록용 메모
this.camera.position.set(x,y,z)
tsx this.camera = new THREE.PerspectiveCamera(60, window.innerWidth / window.innerHeight, 0.1, 100);
// camera객체 만듦 => perspective 카메라인데, fov 60deg, xy크기, frustum 0.1에서 100
this.camera.position.set(0,0,4); // position (X, Y, Z);
this.scene
tsx this.scene = new THREE.Scene(); // scene객체 만듦
this.scene.background = new THREE.Color( 0xaaaaaa ); // background에 헥스 코드 색상 사용
this.renderer
this.renderer = new THREE.WebGLRenderer( { antialias: true } );
// 렌더러 객체 만듦
this.renderer.setPixelRatio( window.devicePixelRatio );
// setPixelRatio => window의 디바이스 pixelRatio
this.renderer.setSize( window.innerWidth, window.innerHeight );
// 랜더할 사이즈
container.appendChild( this.renderer.domElement );
// container에 domElement append

this.renderer.setAnimationLoop( this.render.bind(this) )
// 애니메이션 루프? 60fps

window.addEventListner('resize', this.resize.bind(this));
geometry + material = mesh
const geometry = new THREE.BoxBufferGeometry(); // 박스 const material = new THREE.MeshStandardMaterial( { color: 0xff00000 } ); // 빨간색 this.mesh = new THREE.Mesh( geometry, material ); // mesh 객체 만듦 this.scence.add( this.mesh ); // scene에 mesh 추가 ... render(){ this.mesh.rotateY(0.01); // mesh를 y축으로 돌림 this.renderer.render( this.scene, this.camera ); }- 빛이 없으면, 배경색은 그대로 보이지만 물체만 까맣게 보임
- standard material ⇒ 빛 필요
- basic material ⇒ 빛 적용x
ambient & light
- HemisphereLight : background light
- DirectionalLight : pin light?
const ambient = new THREE.HemisphereLight( 0xffffff, 0xbbbbff, 0.3 );
// hemisphereLight => background light, 배경빛
this.scene.add( ambient ); // 화면에 배경빛 추가

const light = new THREE.DirectionalLight();
// directionLight => 방향, 핀라이트
light.position.set( 0.2, 1, 1 ); // 빛이 비추는 방향 x, y, z
this.scene.add( light ); // 화면에 빛 추가
Control
- orbitControls
const controls = new OrbitControls( this.camera, this.renderer.domElementResize
resize(){
	this.camera.aspect = window.innerWidth/window.innerHeight;
  // inner width & height 반영
	this.camera.updateProjectionMatrix();
	this.renderer.setSize( window.innerWidth, window.innerHeight );
}
102 - 회전하는 지구와 달
내용:
회전하는 지구와 달입니다. sphere에 각 이미지가 매핑되어 있습니다.
일자: 2023년 1월 1일(일)
강의: 유데미 강의 링크
링크: [github wiki], [github page]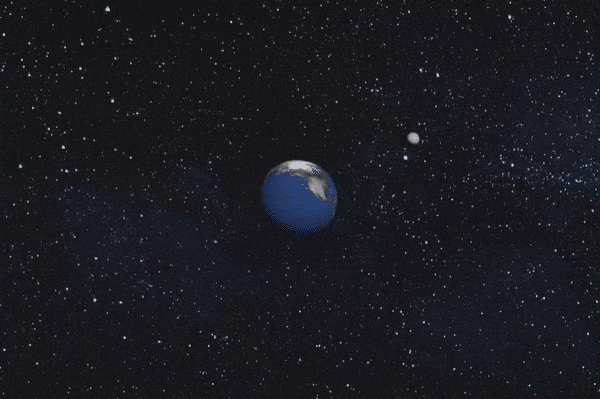
학습내용https://threejs.org/editor/의 에디터를 통하여 GUI로 작업할 수 있습니다.
animation을 위해 script를 작성합니다.
배경과 object에 이미지를 매핑할 수 있습니다.object는 부모/자식 관계를 가질 수 있습니다.
CSS 적용editor에서 배경의 color 또는 texture 이미지를 선택할 수 있습니다. 하지만 이미지를 선택했을 때, 원하는 것보다 밝아 보이는 현상이 있습니다. (빛 설정 등으로 인한 것으로 예상됩니다.)
소스 이미지
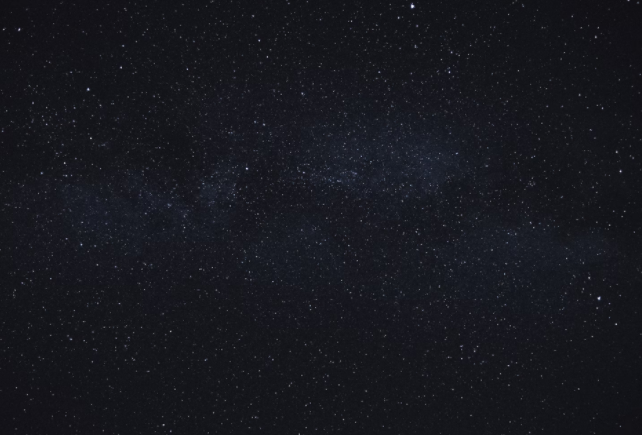
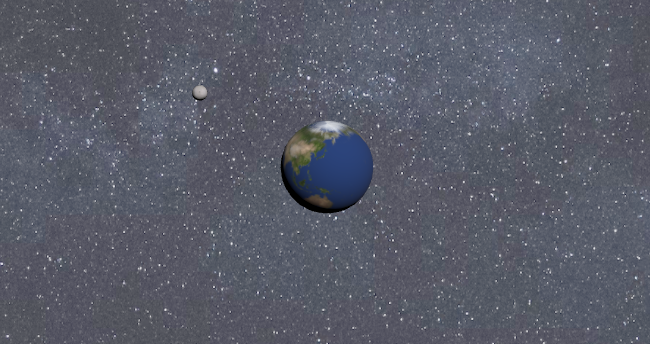
예상과 다르게 적용된 모습
배경을 투명으로 랜더하여 body에 우주 이미지를 넣는 방법을 생각했지만,
editor에서 publish된 코드가 복잡하여 적용할 수 없었습니다.
따라서 현재로서는 어색하지만 CSS로 구현하는 방법밖에 없다고 생각되어,
전체 화면을 ::after로 덮어쓰고 blender mode와 radial-gradient로 해결하였습니다.
radial-gradient는 우주 image를 lighten mode으로 덮어쓸 때 지구가 반투명하게 보이는 것을 막기 위해 사용하였습니다.body::after { content: ""; width: 100vw; height: 100vh; position: fixed; top: 0; left: 0; z-index: 9; background: radial-gradient(#16161c 5%, transparent 20%), url("../../../assets/map/space.jpg"); mix-blend-mode: lighten; }적용한 결과
기록용 메모
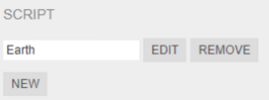
Three.js Editor
코드를 줄이고 GUI 작업 https://threejs.org/editor/
project 탭
프로젝트 이름 설정
scene탭
object 선택하고 이름 변경
metarial
wireframe 체크 가능
type ⇒ standard / basic (빛x)
add
sphere 추가
directional light 추가 < object에 직접 때림
map : 이미지 추가하고 체크

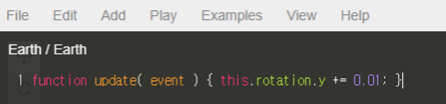
script
script에서 new 누르고 이름 입력 후 edit
스크립트 입력 후 play를 눌러 확인할 수 있음
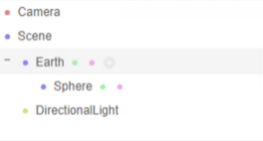
child
moon을 만들어서 드래그 ⇒ earth의 child로 놓기
배경 설정
color 또는 texture 설정할 수 있는데, 지금 설정으로는 원하는 texture 설정이 어려움
빛 때문에 배경 이미지가 밝아보이는 것 같음
해결 방안: 배경 투명으로 랜더해서 body에 우주 이미지 넣기
배경 투명으로 만드는 방법을 모르겠음 ⇒ publish된 코드가 훨씬 복잡
전체화면 ::after로 덮어쓰고 css로 해결하기
그냥 ::after에 blend mode를 사용하면 지구가 반투명해보임
radial-gradient사용
background: radial-gradient(#16161c 5%, transparent 20%), url("../../../assets/map/space.jpg");
mix-blend-mode: lighten;
Publish
file > publish : 압축폴더로 저장됨
three.js editor
threejs.org
반응형'개발 블로그의 흔적 > threeJS' 카테고리의 다른 글
Three.js, WebXR - 3일차 (0) 2023.01.22 Three.js, WebXR - 2일차 (0) 2023.01.19